... And Now for Some Math
At BEAM Discovery, the 100 Problem Challenge encourages students to work collaboratively; this past summer students earned a badge for completing a problem from this list of intriguing, puzzle-like problems. We can’t offer you a badge, but this one is pretty satisfying to solve, so give it a whirl!
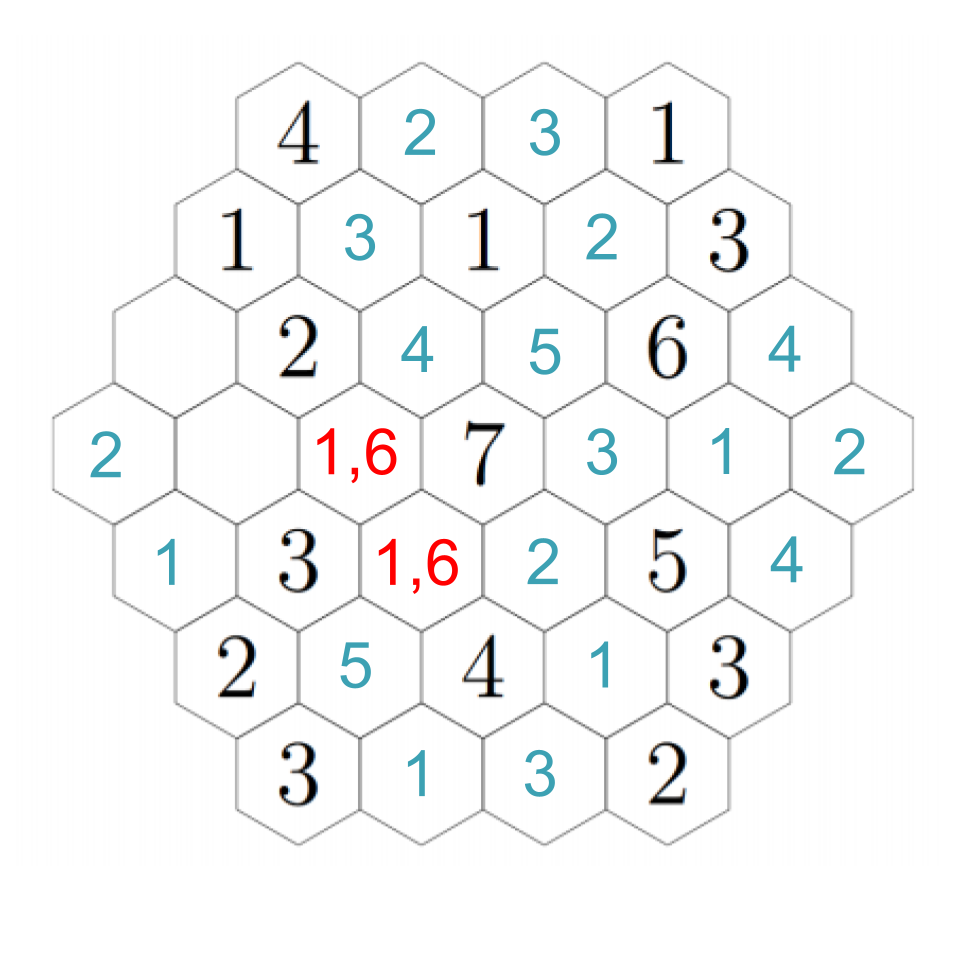
Fill in each of the hexagons below with a positive integer so that the number in each hexagon is equal to the smallest positive integer that does not appear in any of the hexagons that touch it.
(Credit for this problem goes to USA Mathematical Talent Search, which, along with BEAM, is part of the Art of Problem Solving Initiative.)
Read on below the figure for the solution.

Solution:
We start by reframing the problem a bit. The problem says the number in each hexagon should be equal to the smallest positive integer that does not appear in any of the hexagons that touch it. Here is another way to say the same thing: each tile must have all of the whole numbers less than its number contained in the adjacent tiles. For example 4 must have 1, 2, and 3 in the tiles surrounding it. Why? Think about it this way: if any of the numbers smaller than 4 weren't in the tiles adjacent, then it wouldn't be the smallest of the numbers that aren't adjacent. If they do all appear then it is, in fact, the smallest of the numbers in adjacent tiles.
So what does that mean? The 7 in the center, for example, has to be surrounded by 1, 2, 3, 4, 5, and 6. But for any of the 1’s in the puzzle, there is no restriction on what is allowed to be by them except that they can’t be adjacent to another 1.
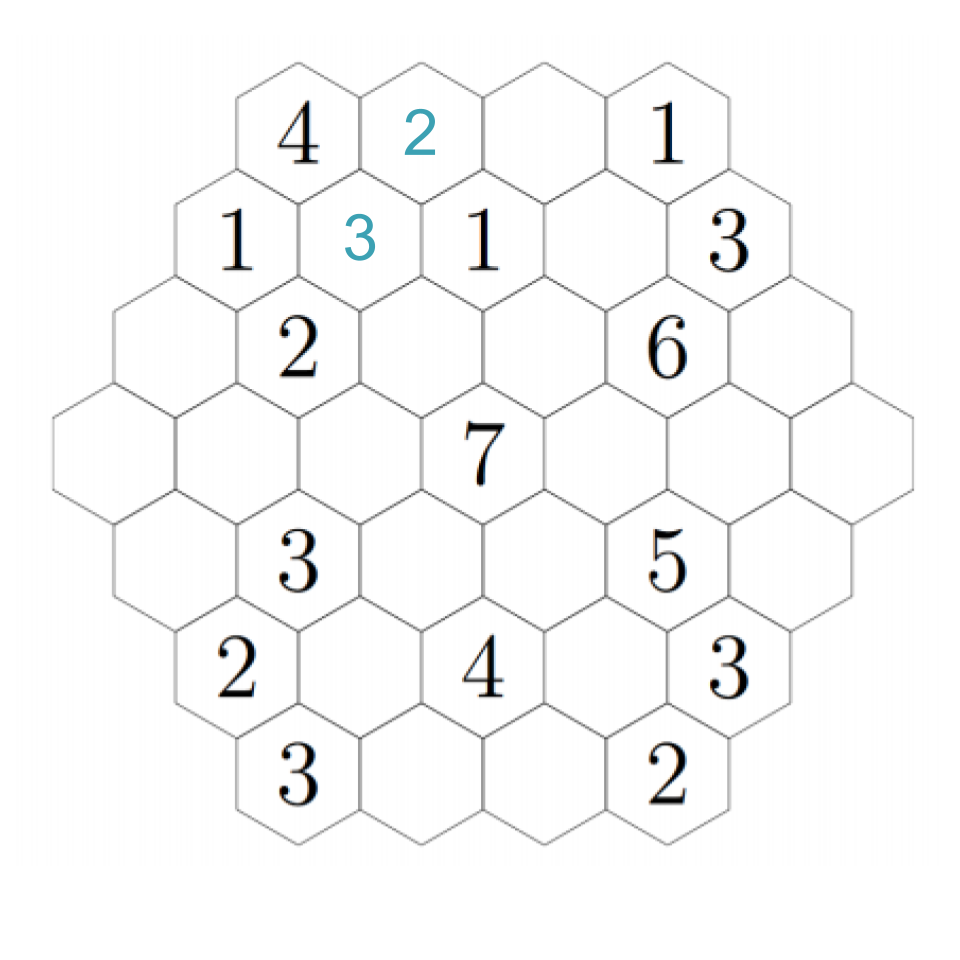
Let's look for any deductions we can make right out of the gate. Start with the four in the upper left: it has three hexes near it, which must be filled with 1, 2, and 3. There's already a 1. The 2 can't appear next to the other 2, so we can fill them in:
Now that you have a flavor for this, see if you can figure out what we might do next. This is going to be a lot more fun to read if you try to anticipate what we'll do!
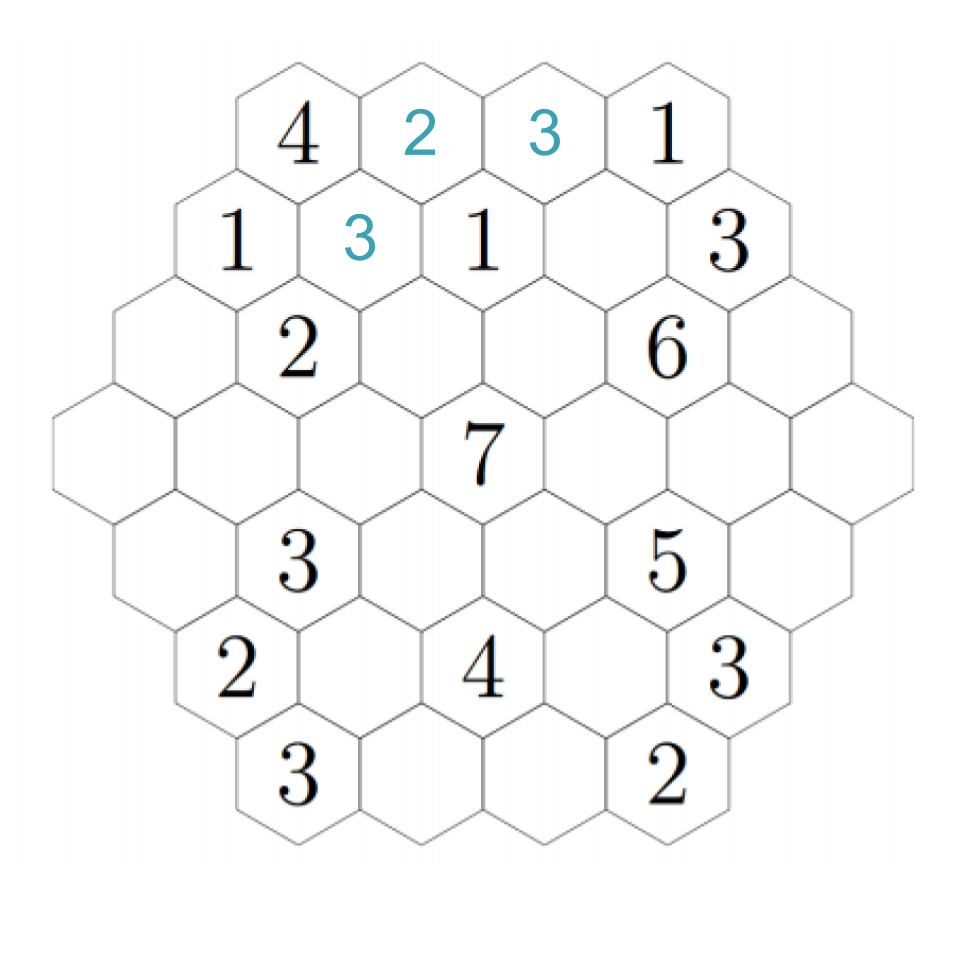
Did you figure it out? Consider the options to the right of the new 2. This hex cannot be a 1 or a 2, because those are adjacent; it cannot be a 4 or higher because there is nowhere nearby to put a 3. Hence, it must be a 3.
That seems to be the last of the clear deductions we can make... or is it? If you're really eagle-eyed, you'll see that there's only one hex next to the 6 that can possibly have a 5 in it, and that's just to its left. Every other hex is either next to a 5, or doesn't have enough free hexes next to it to get it up to five.
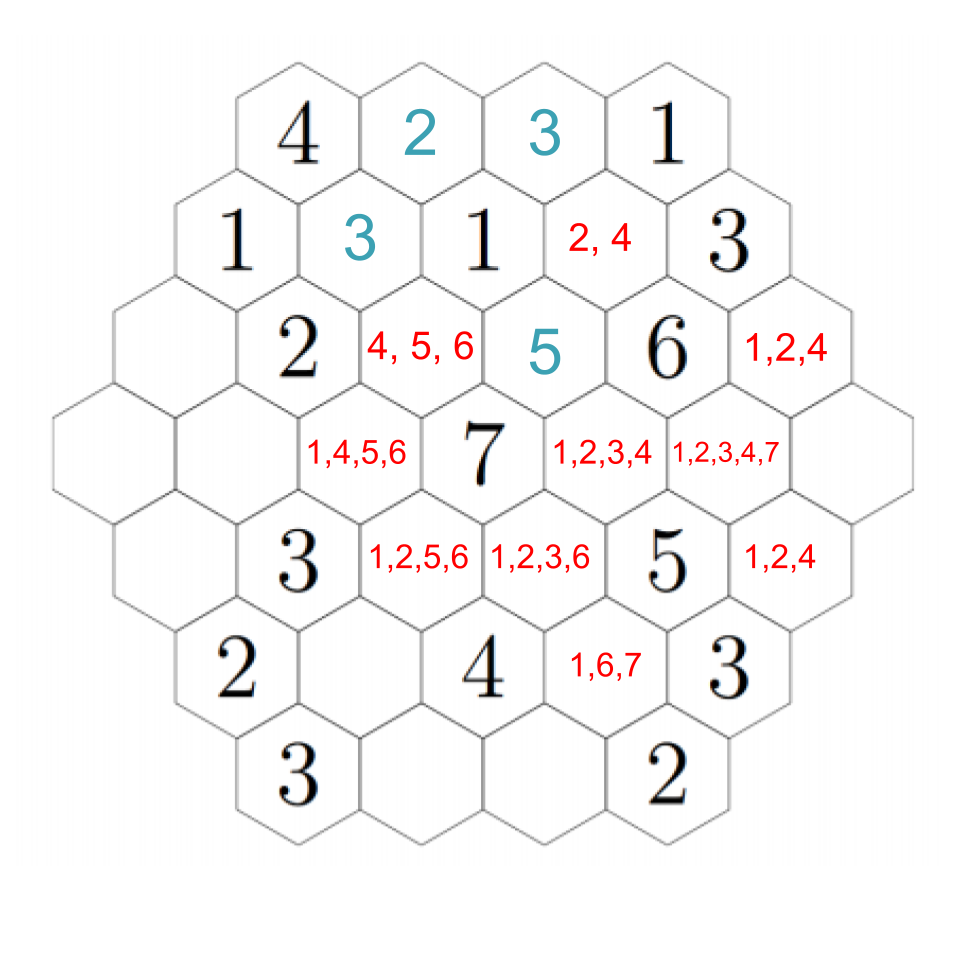
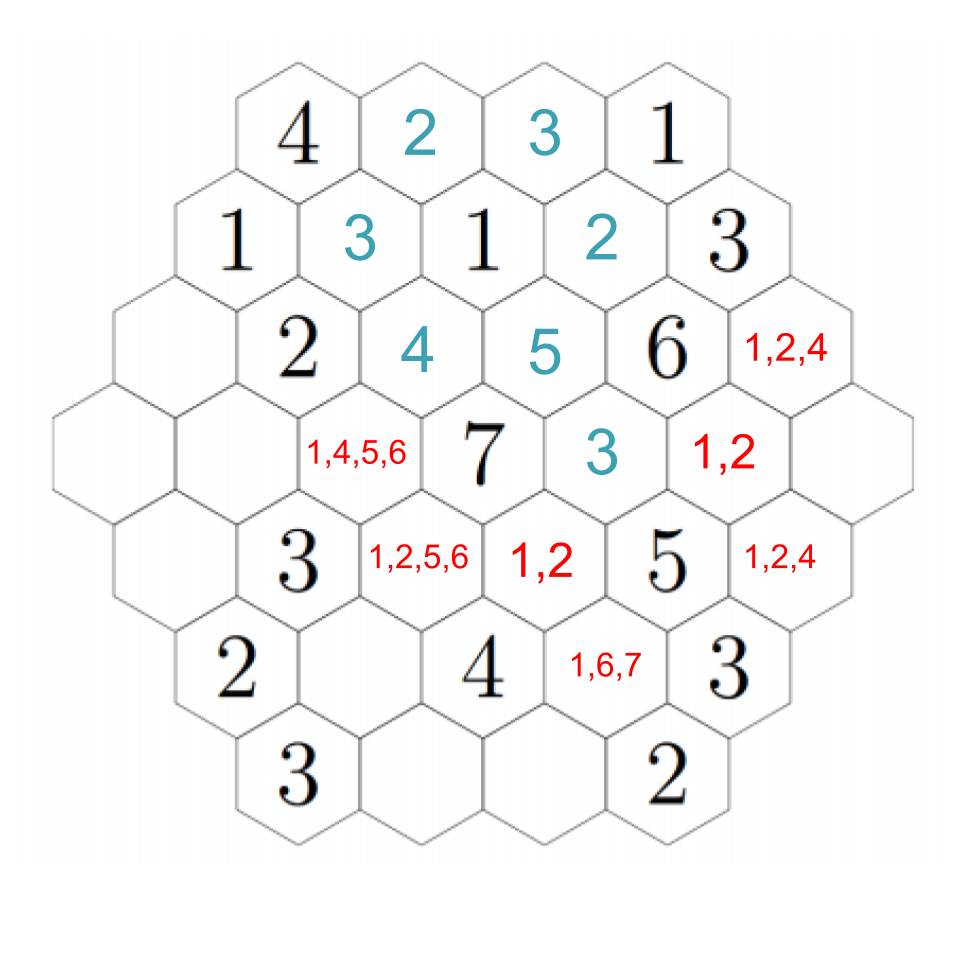
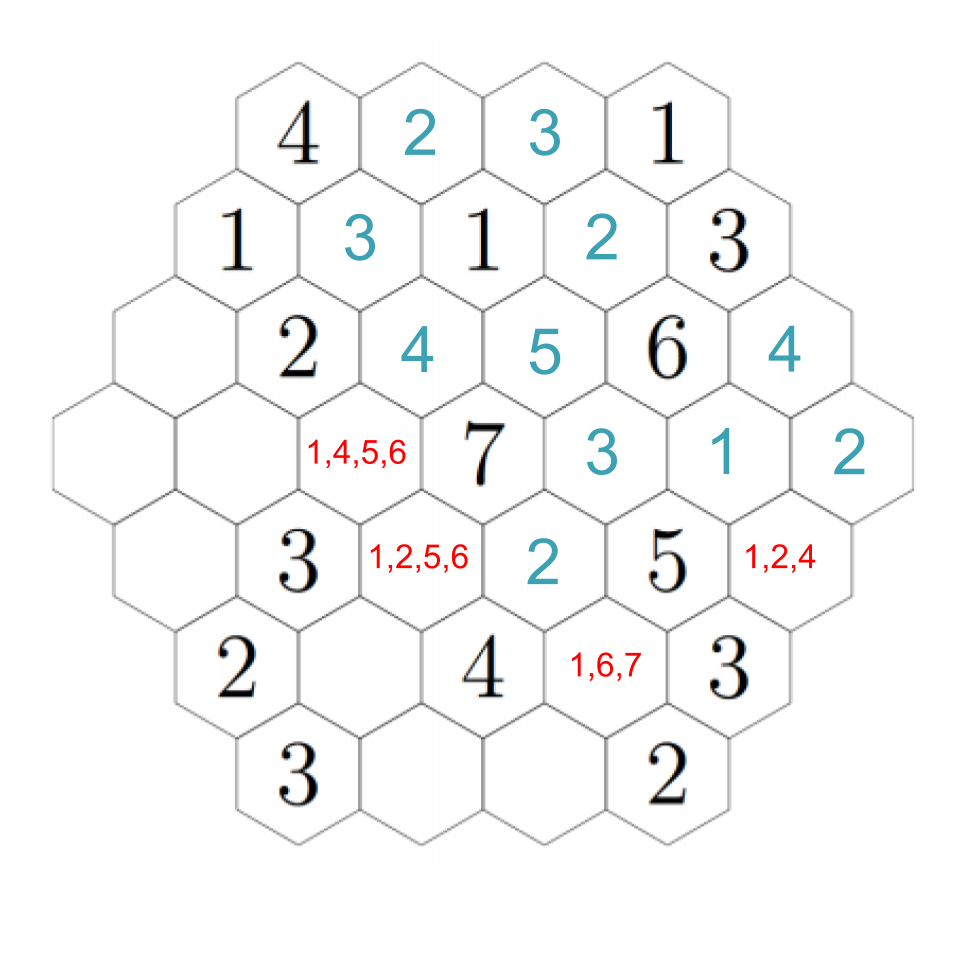
One way to keep track of all that is to write in all the options for the hexes you're considering. That helps you organize your work, something like this:

In the above, we've calculated all possibilities for a few spots, knowing that they can't touch the same number on any edge, and that they must have enough open spaces nearby to get them up to the possible numbers.
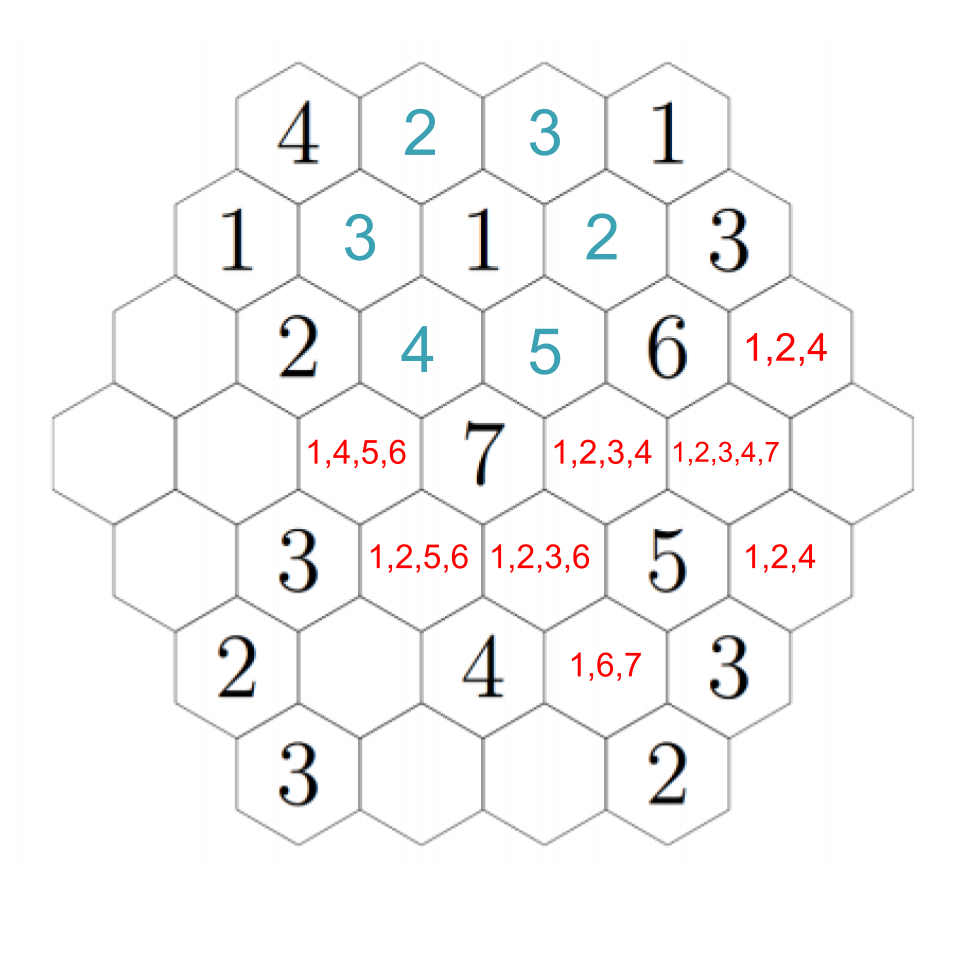
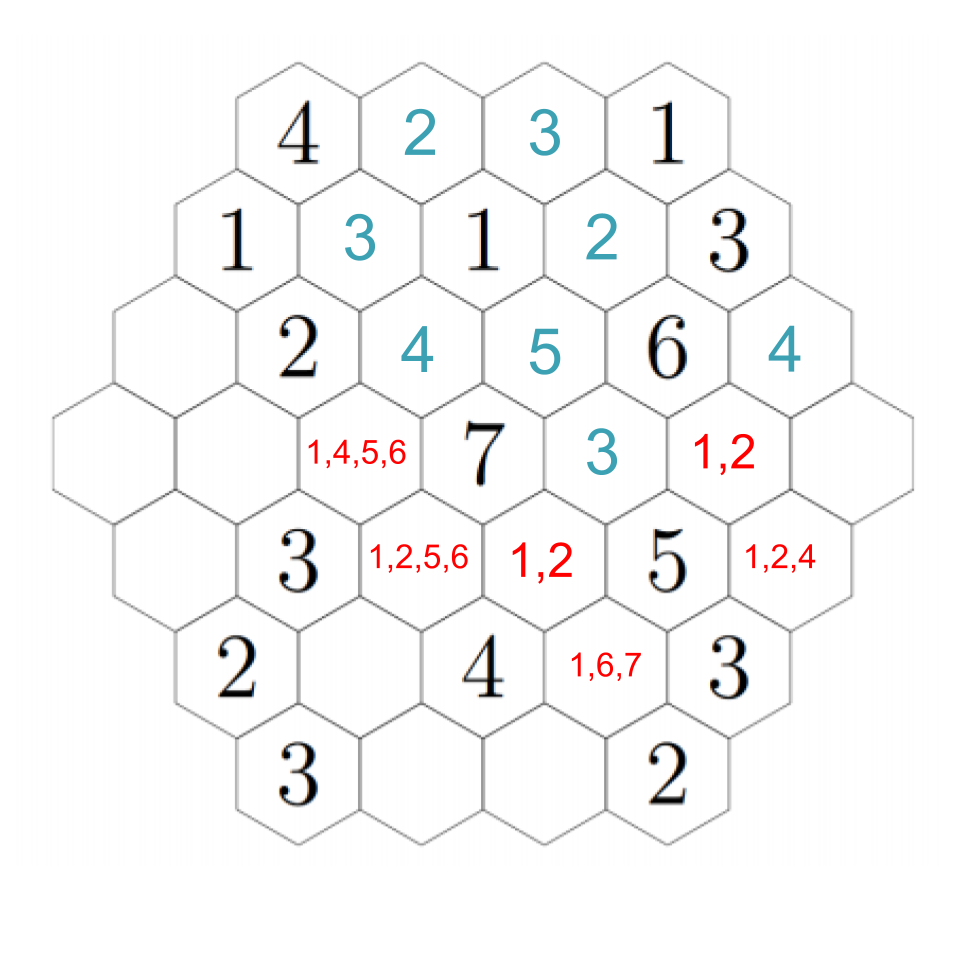
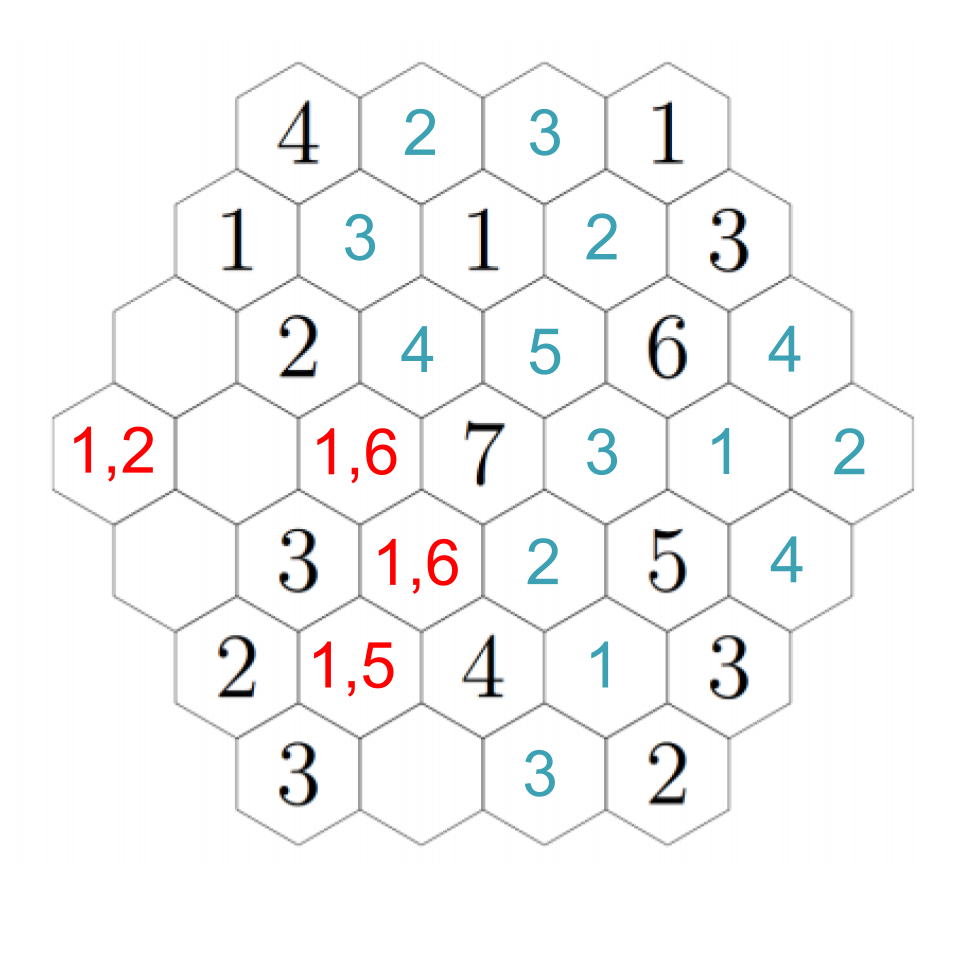
Anyway, back to our puzzle. We must have a 5 adjacent to the 6, but there is only one spot that can support a 5, so that must be the required 5:
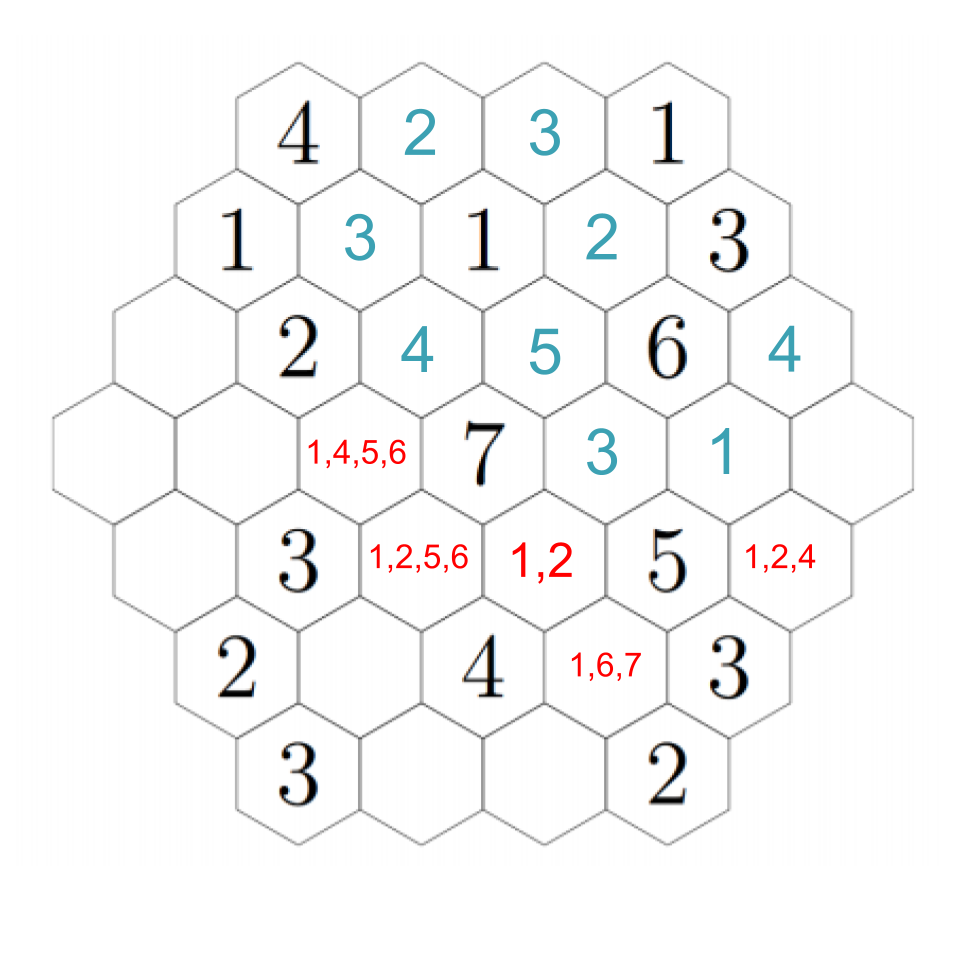
Now we can see that above the 5, we must have a 2; the 5 also needs to have a 3 and 4 nearby, and there's only one way to fill those in the remaining two open hexes near it. Click through the images below to follow step-by-step.


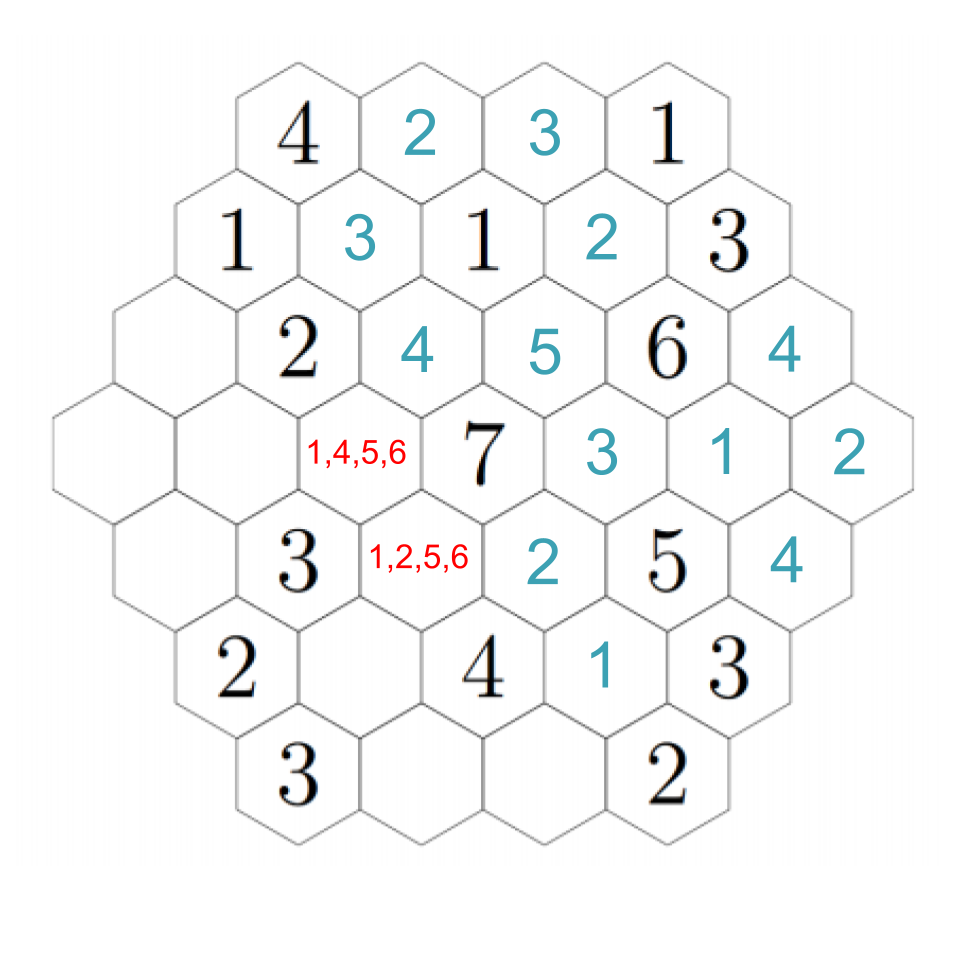
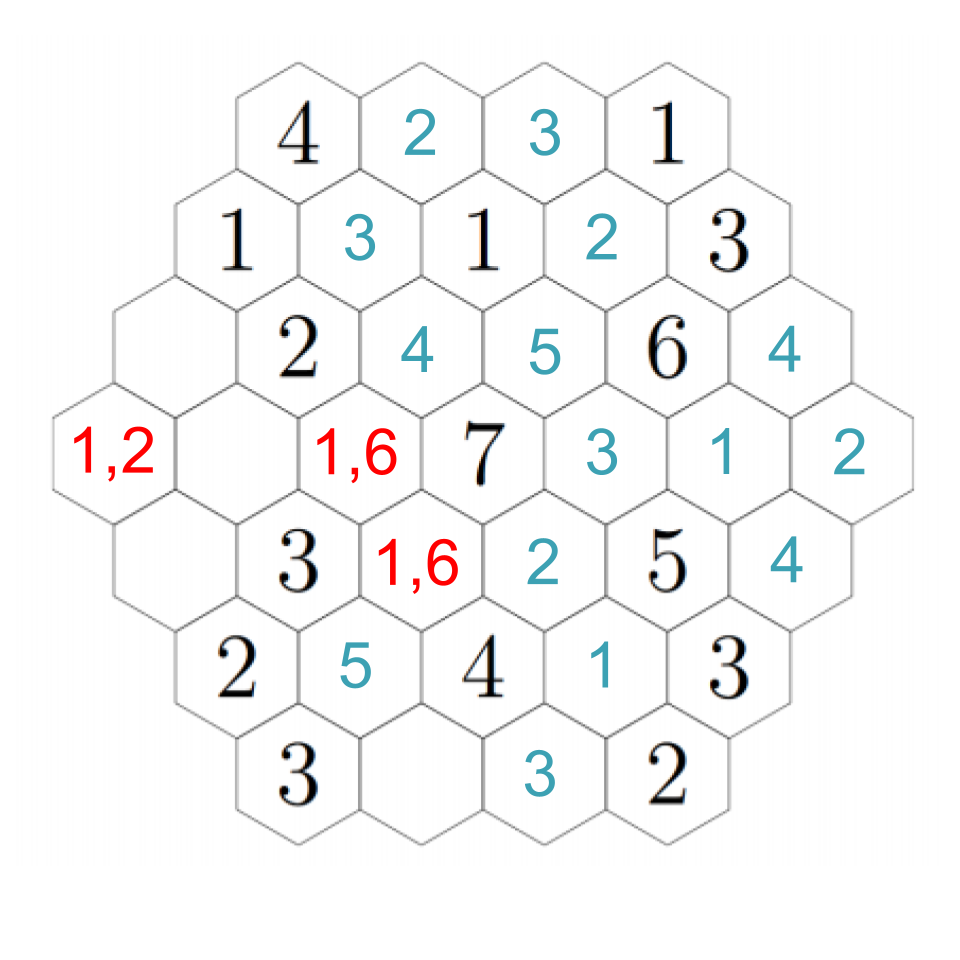
The 3 we just placed needs to have a 1 and 2 adjacent to it, which means the two remaining open hexes must be a 1 and 2 (although we don't know which is which yet). However, that means that the 6 next to the 3 can only have its needed 4 in the hex just to its right, because all the other hexes will be taken. It also needs to have an adjacent 1, which resolves which of those two hexes near the 3 have which numbers. Click through for each step.
Now we can fill in several basically on autopilot. The 4 we just put in still needs an adjacent 2, so we fill it into the rightmost hex, which puts a 4 just below it, and the 3 in the lower-right still needs a 1, so we fill it into the only empty hex.
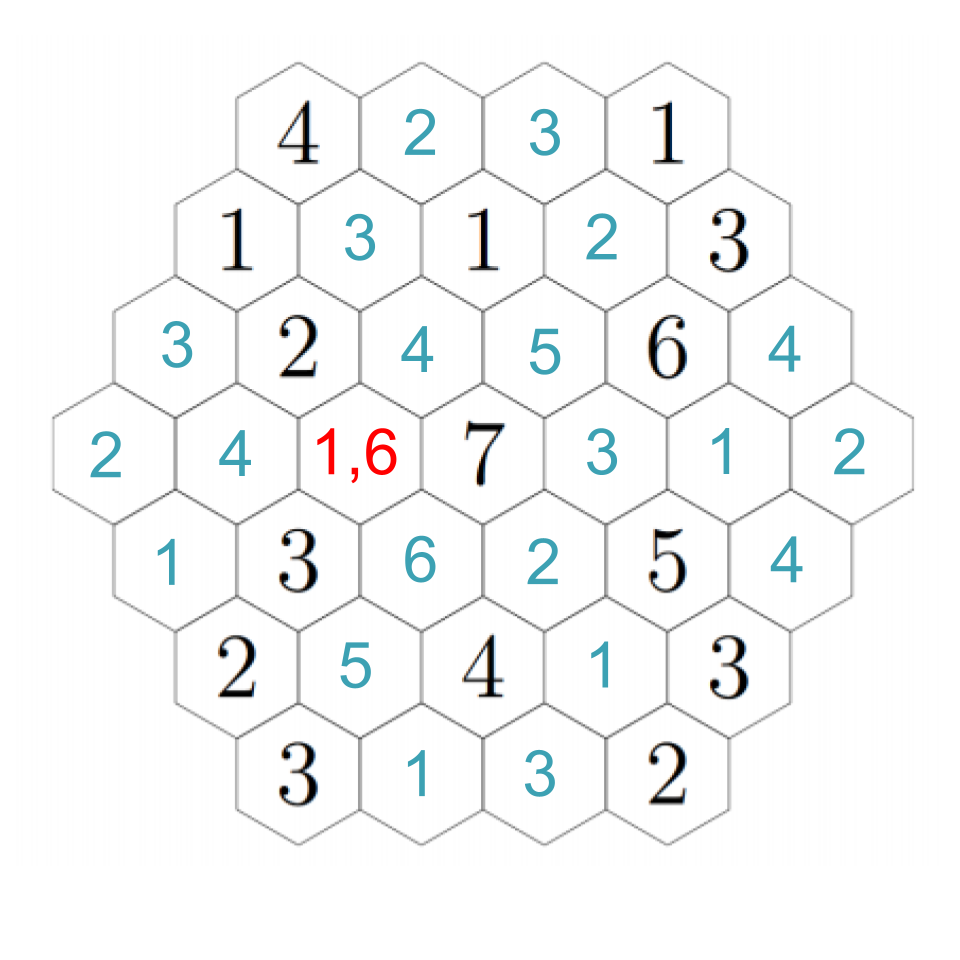
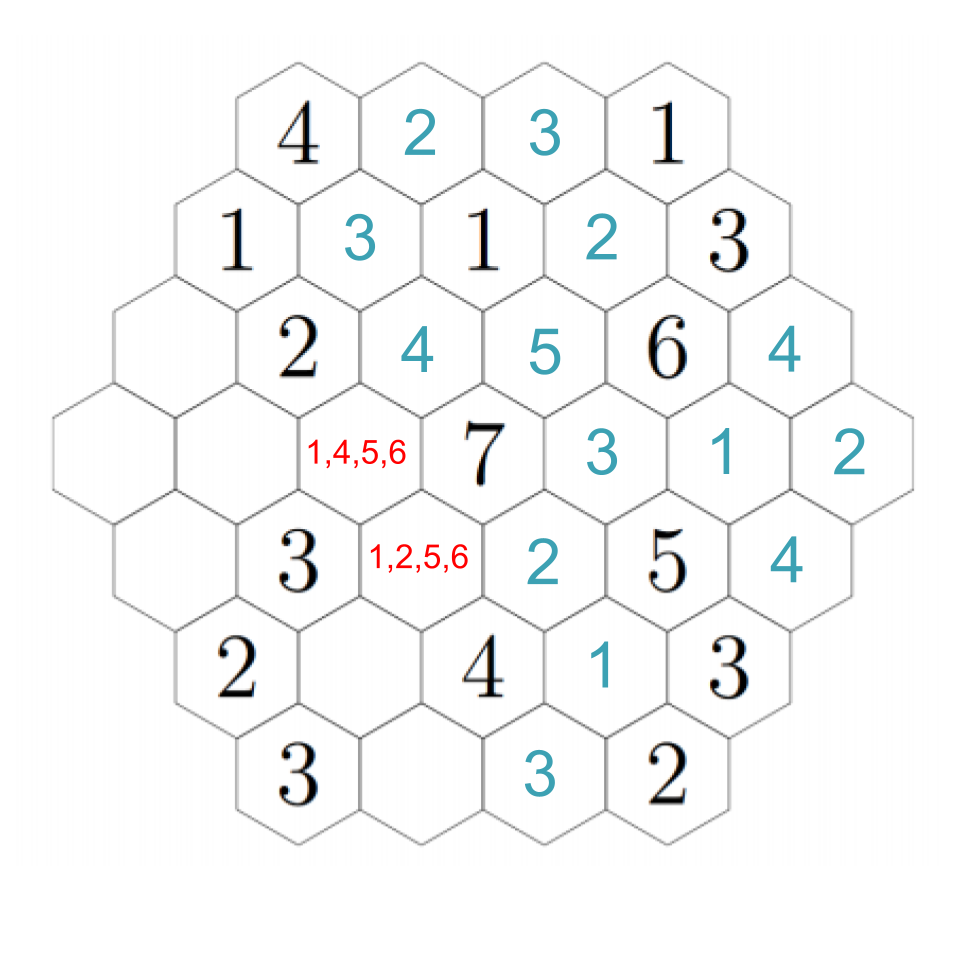
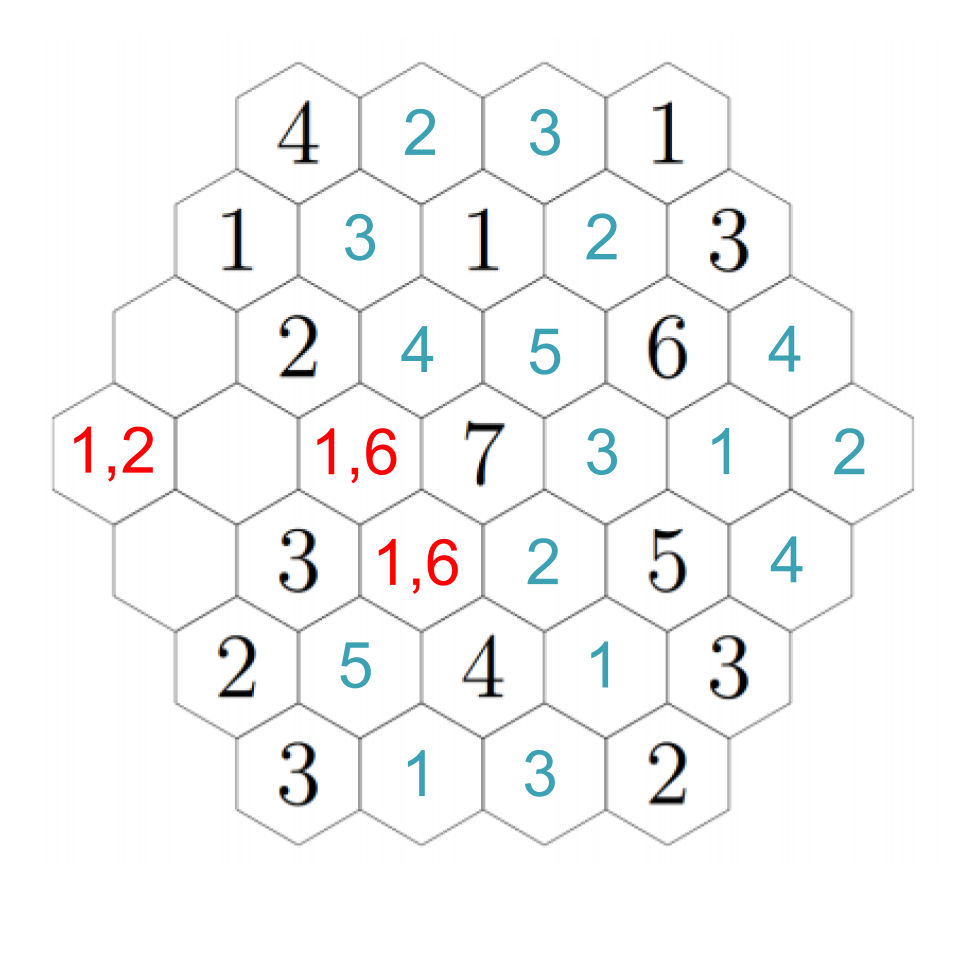
The hex just underneath the 1 must be a 3, because the remaining hex to its left cannot be a 3 so it just has 1 and 2 adjacent. Click through to see each step.

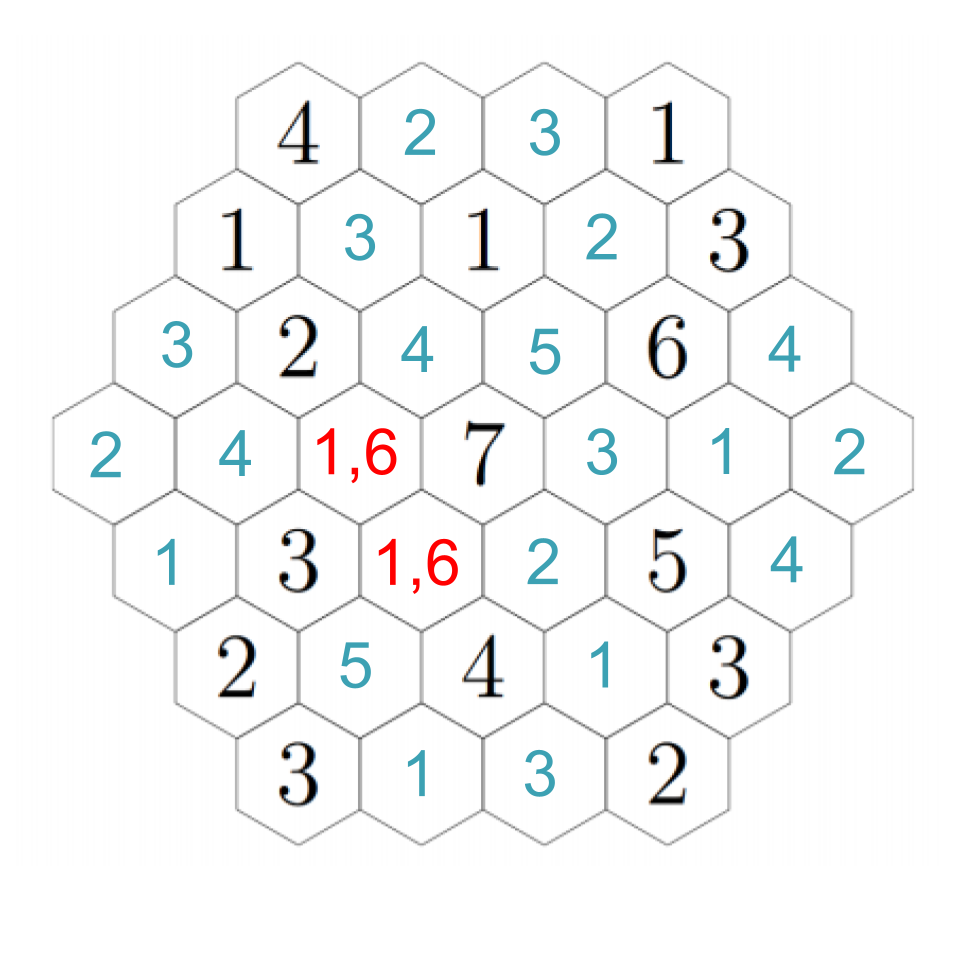
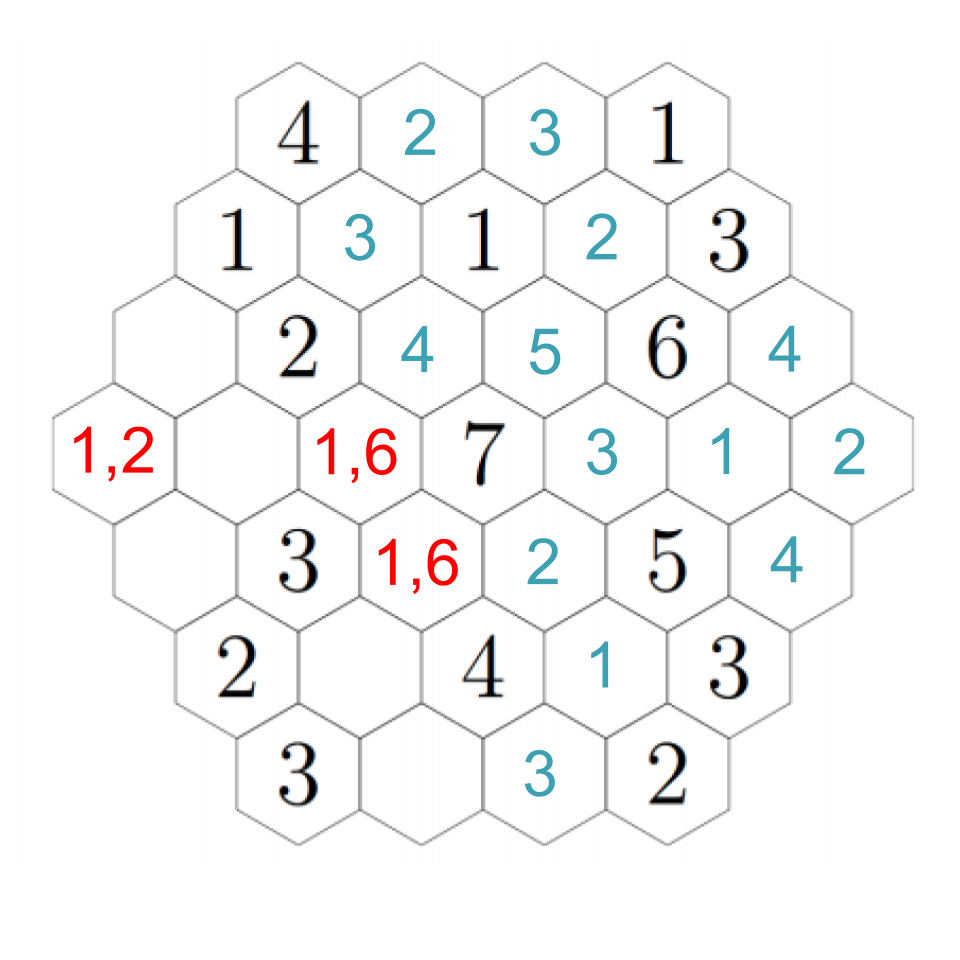
There's one other deduction we can make now. Look at the leftmost hex. None of the hexes next to it can be 2's because they're all next to 2's! That means it must be a 1 or a 2 itself. We'll figure out which in just a moment.

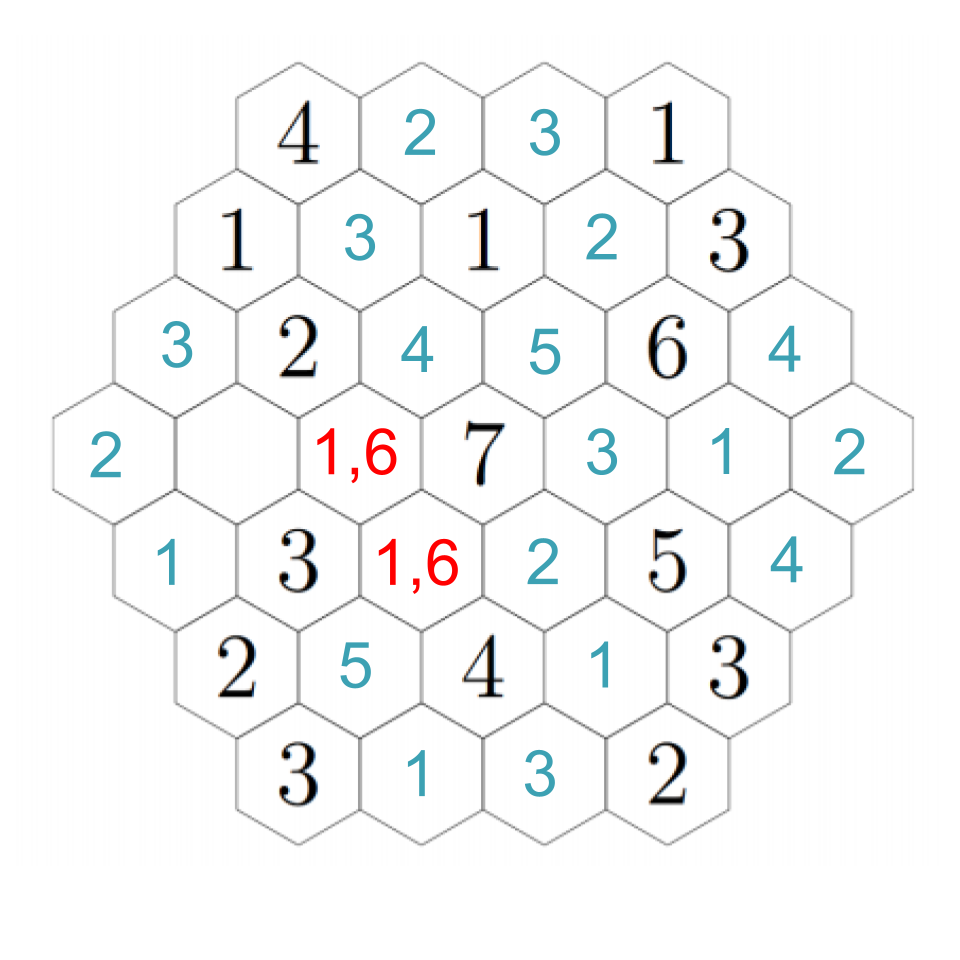
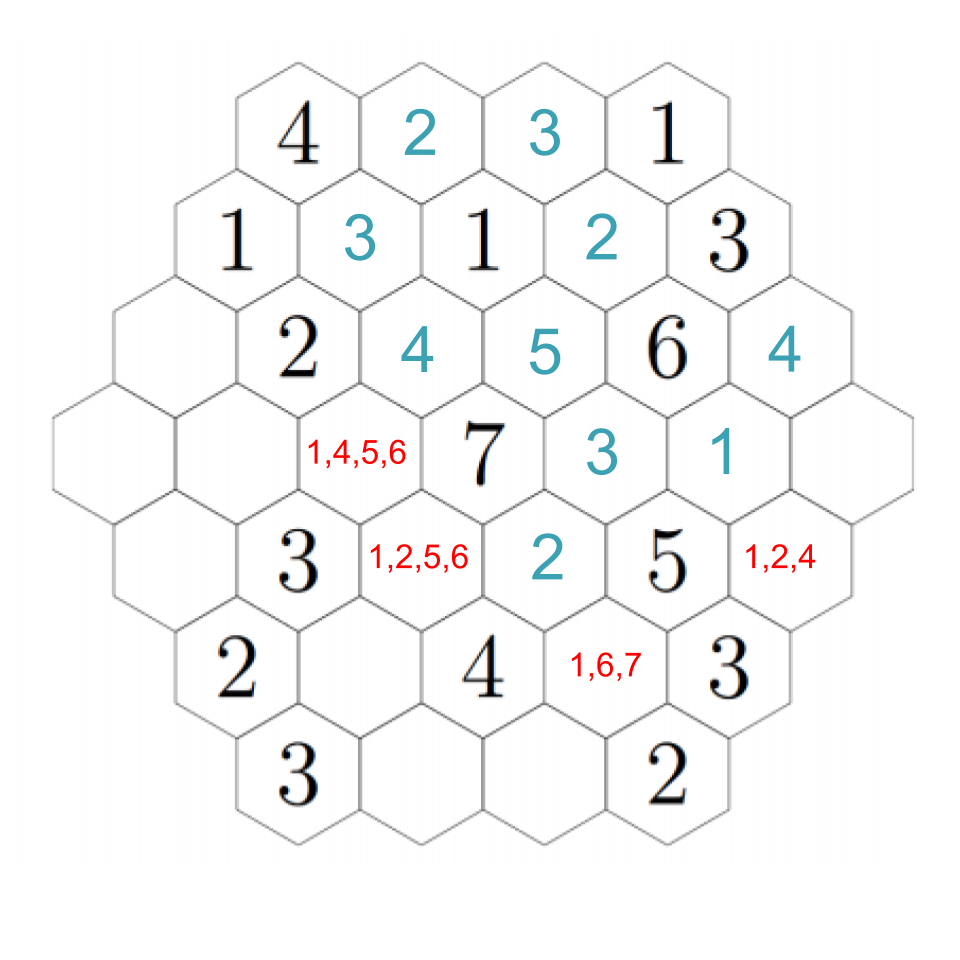
To resolve our remaining questions, look again at the 7. We still need a 1 and a 6, and in particular the hex down-left of the 7 must be a 1 or a 6. Down-left from that, we see another empty hex that can only be a 1 or a 5 --- except it can't actually be a 1. If we choose a 1 down-left from the 7, then this adjacent hex can't be a 1; if we choose a 6 down-left from the 7, this adjacent hex needs to be a 5 to make the 6. In any case, we put a 5 there. Then down-right from there we have a 1. The 2 to its left must be next to a 1, so that fills in a 1 in the remaining adjacent hex, which fills in a 2 in the left-most hex (which we already figured out must be a 1 or a 2, but now it's next to a 1). Click through to see the progress through these steps.
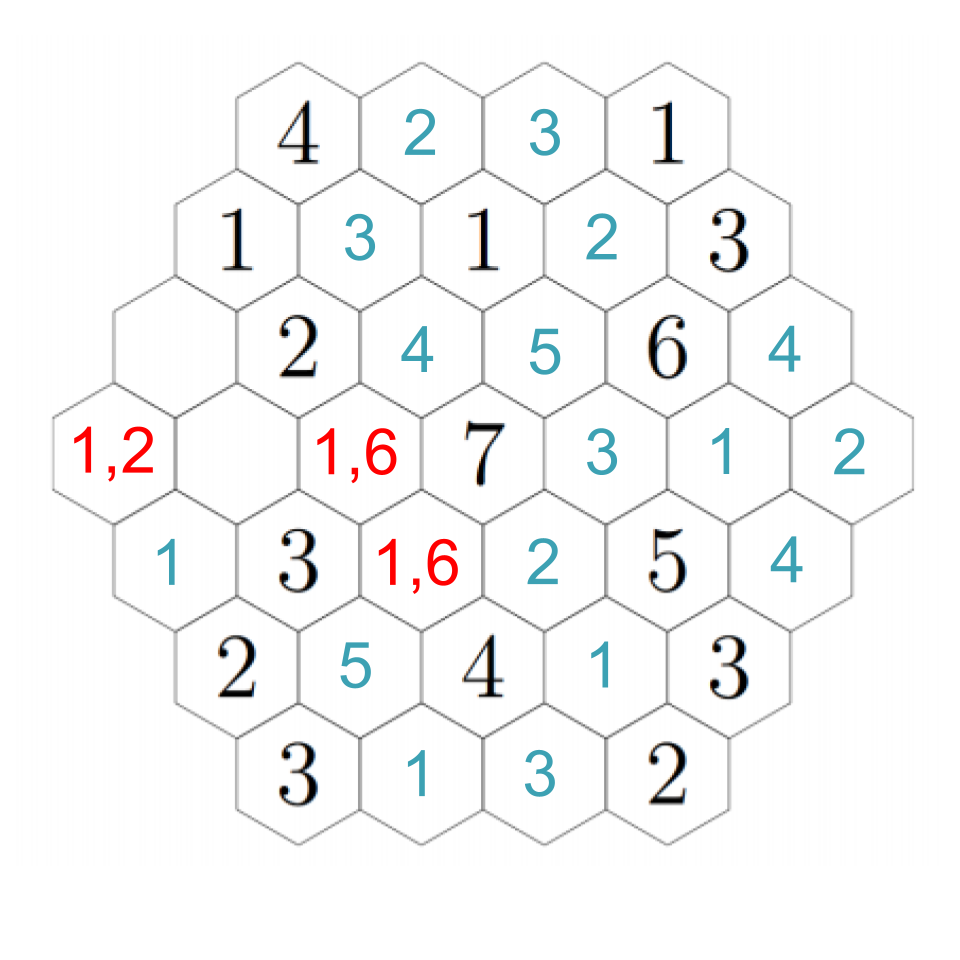
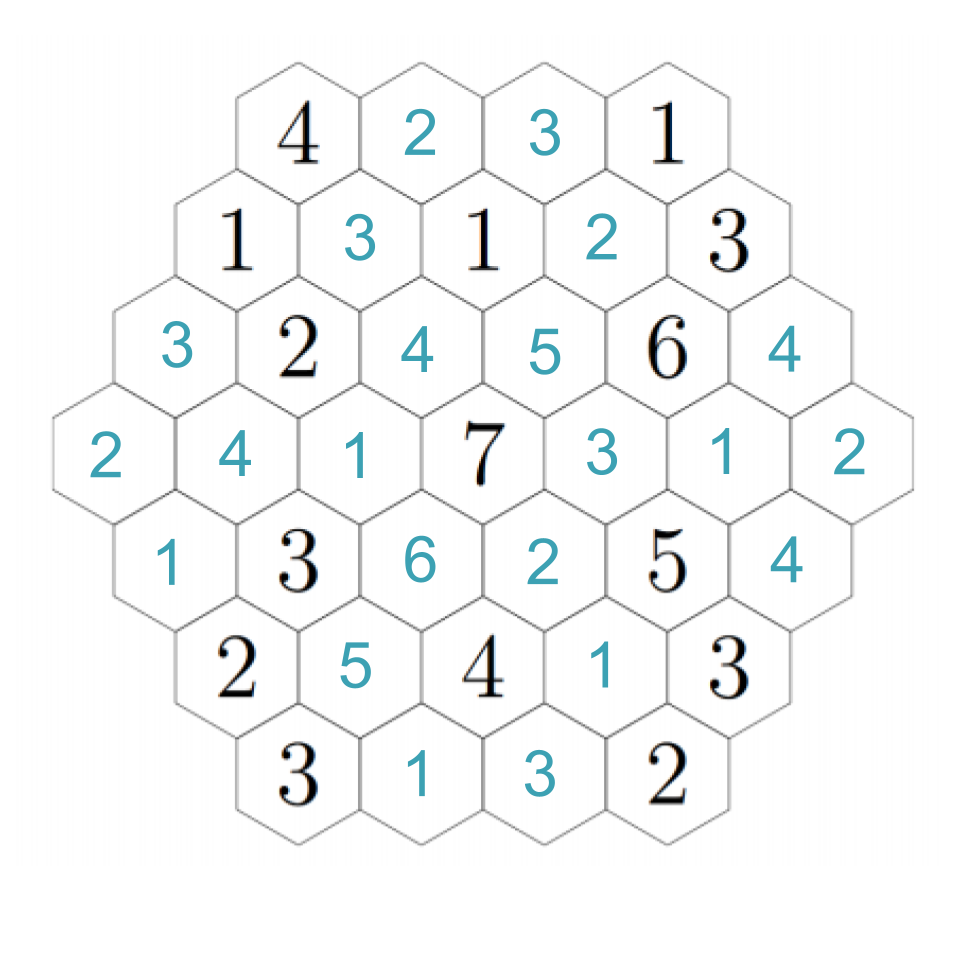
Up-right from the 2, the hex must be a 3 (because it cannot be next to a 3). Down-right from that, we must have a 4 (the empty hex is either a 1 or a 6). That confirms a 1 to the right, and a 6 down-right from that, completing the image. Click through these steps below to see the finished image!